Who is ready for another beauty fix from the fabulous Berta of Mommy Like Whoa? Get ready for your complete guide to perfectly defining and shaping your eyebrows.
Also, don’t miss Berta’s other contribution “How to do your makeup in 10 minutes or less!”
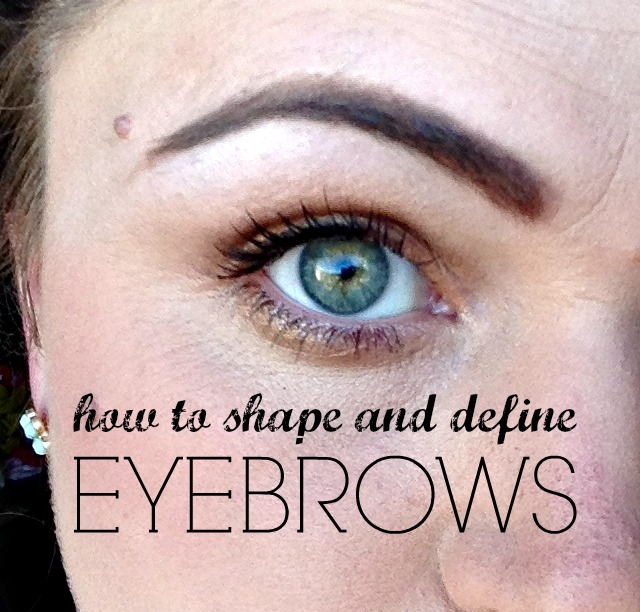
Hey guys! It’s me again, Berta from over at Mommy Like Whoa! I had such a great time last month doing my 10 Minute Face Tutorial, that I wanted to come back and share something else with you! Eyebrows!
Eyebrows are very important. They frame your face and complete your look. They are often the most underrated beauty aspect, but they really need to be given a little attention.
I am going to show you how to clean up, shape and maintain gorgeous brows, with very little effort! So what are you waiting for? Let’s get to it!
First off, we pluck chickens, not eyebrows. That’s what my beauty school teacher told me once, and it’s always stuck with me. We tweeze eyebrows. Let’s start there.
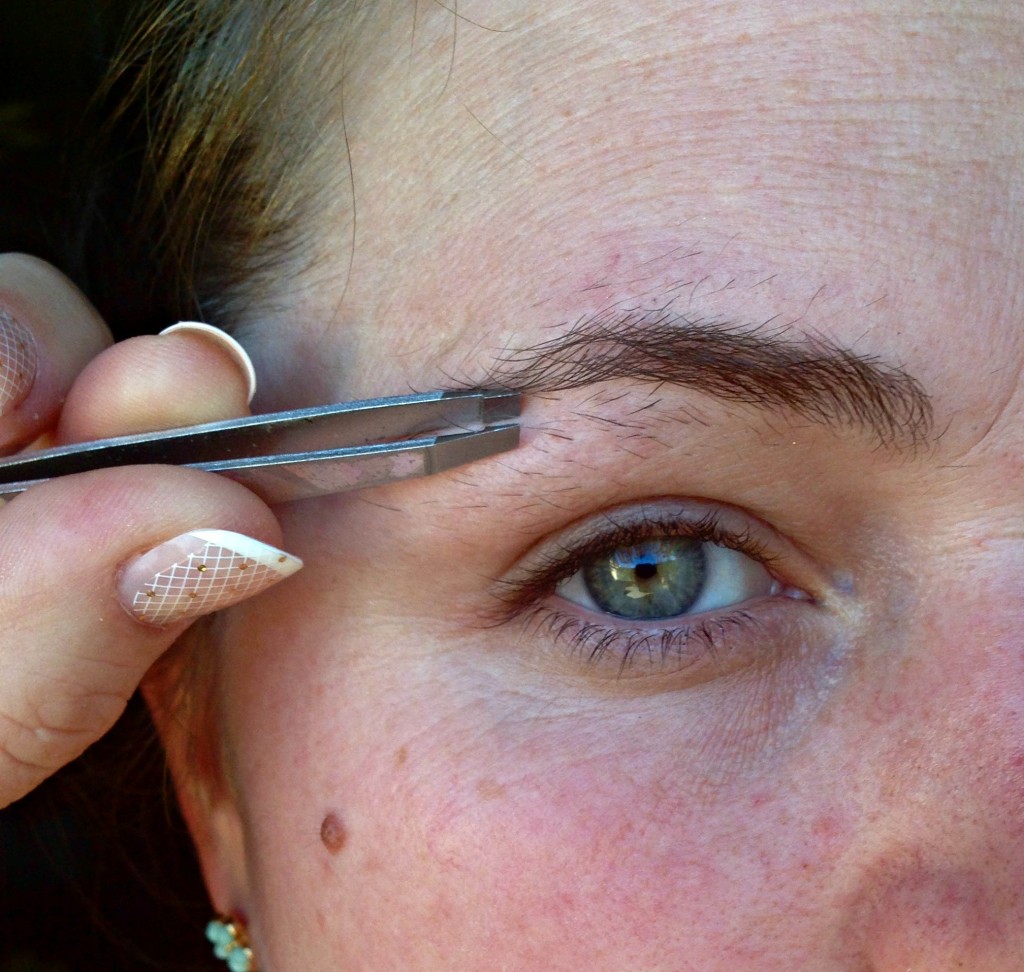
Look at my gnarly brows. I grew them out for you!
Personally, I prefer to have my eyebrows waxed, it’s far less painless than tweezing them out individually, but to each her own.
If you’re planning on doing it yourself, make sure you follow this guideline to getting the right shape for your face.
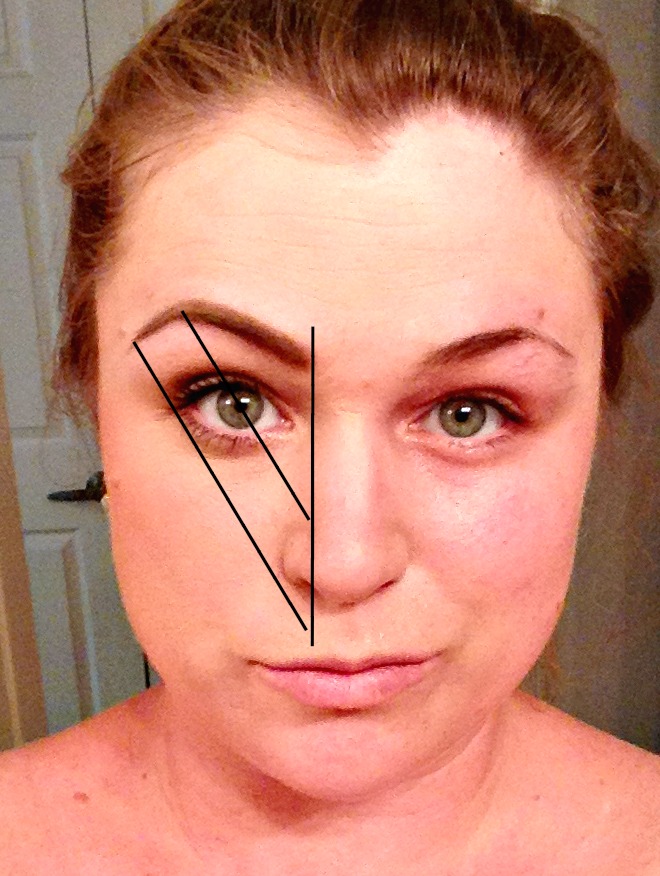
The brows shouldn’t extend past the bridge of your nose. That’s unibrow territory.
And at about a 45* angle from the bottom of your nose should be where it ends. Again with the 45* angle at the top of the bulbous part of the nose for the arch. Too much math? Here’s another one…
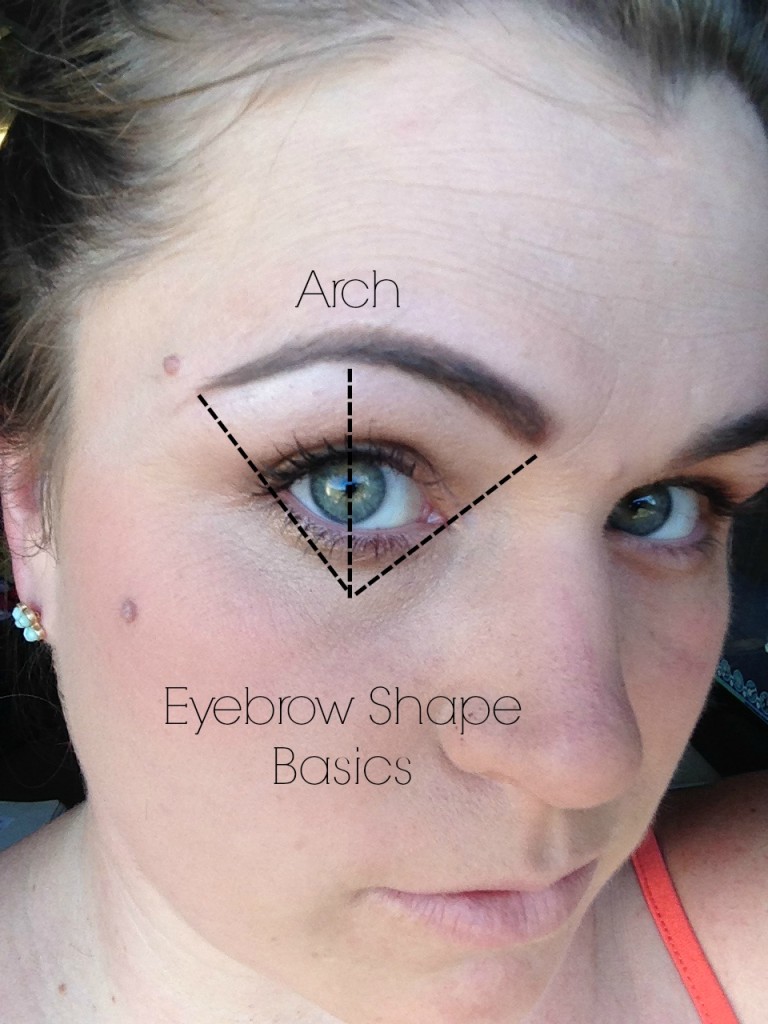
The arch should be right around the middle of your eyeball. Use your pupil as a guide. The left and right diagonals frame your eye, just like your brow does.
If this is all just too much for you, any brow shaping specialist should be able to help you. Benefit’s Brow Bars are fantastic for this (and affordable too). Plus once you’ve had them professional shaped, all you have to do is maintain them by tweezing the strays!
Once you have your shape, let’s look at some basic brow products.

There are my favorites and what I use. I own both the dark colors and also the light ones, depending on how I wear my hair and makeup, I often go darker or lighter with my brows. If it’s a normal “running errands” type day, I stick with light. Dramatic evenings out I tend to go darker. That’s just plain personal preference.
Pictured above is;
e.l.f. Studio Eyebrow Kit MEDIUM
Benefit Cosmetics Gimme Brow – medium/deep
Smashbox Angle Brow Brush, No.12 (I have a different duo brush that’s not offered as it was part of a promo)
Tweezerman Slant Tweezer, Stainless Steel (different than pictured above, but this is my other tweezer I love!)
Starting with your e.l.f. kit, using the gel side and the angled brush, outline the shape of your brow.
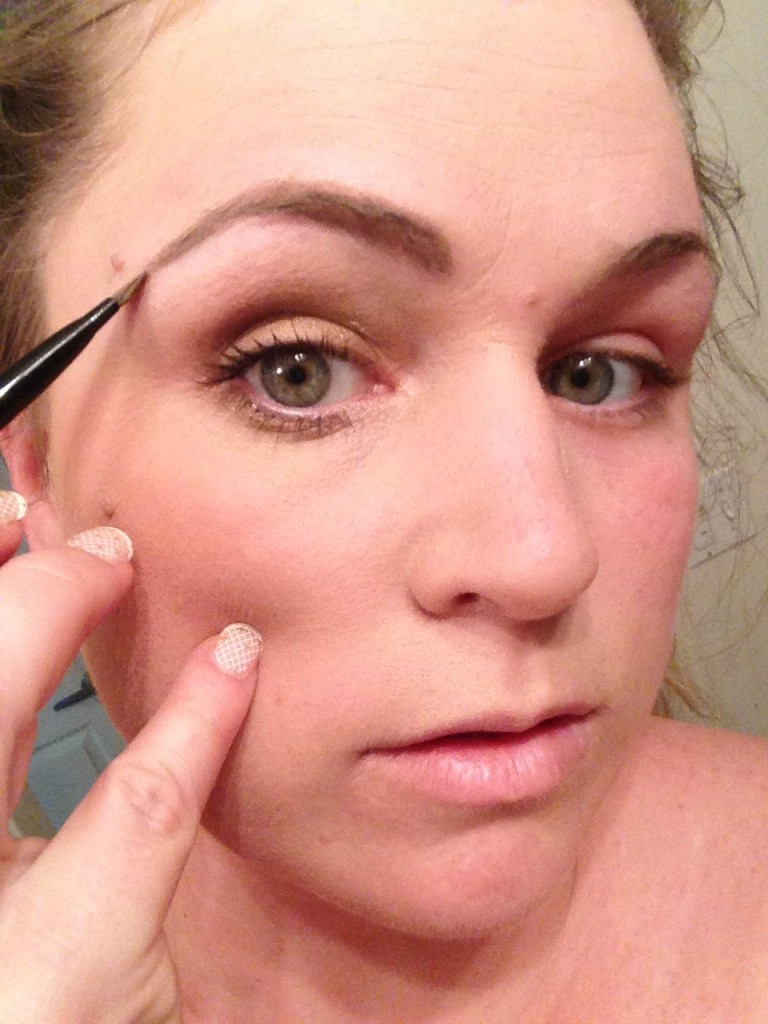
Fill in the gaps and “bald spots” with your powder.
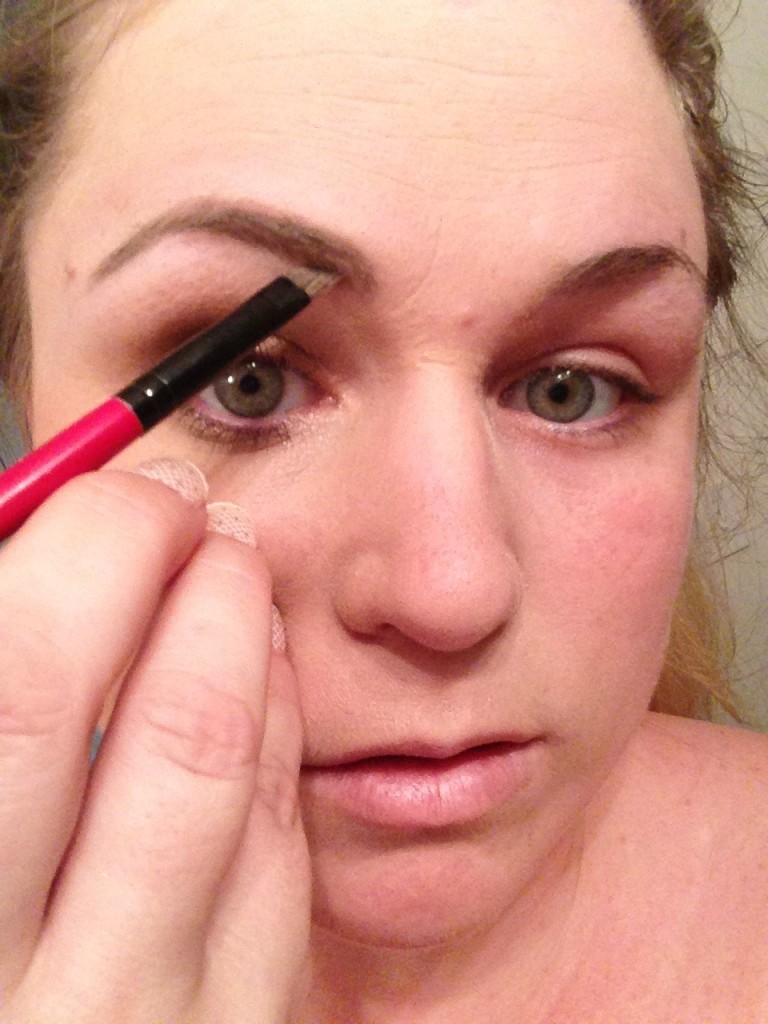
Add natural texture with the Benefit Gimme Brow fiber gel.
Clean up any mistakes you made with some concealer on a short shadow brush, outlining the brow shape and highlighting the brow bone.

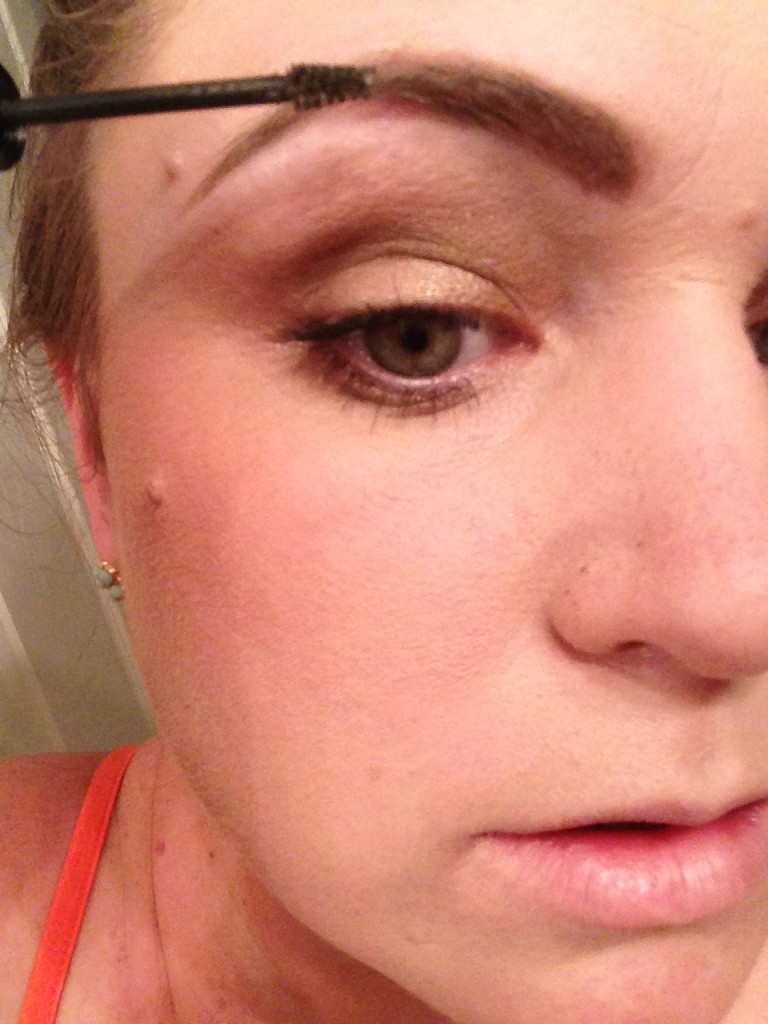
And BAM! Perfectly groomed and styled brows.

Here’s a comparison, side by side, of my face with eyebrows and without.
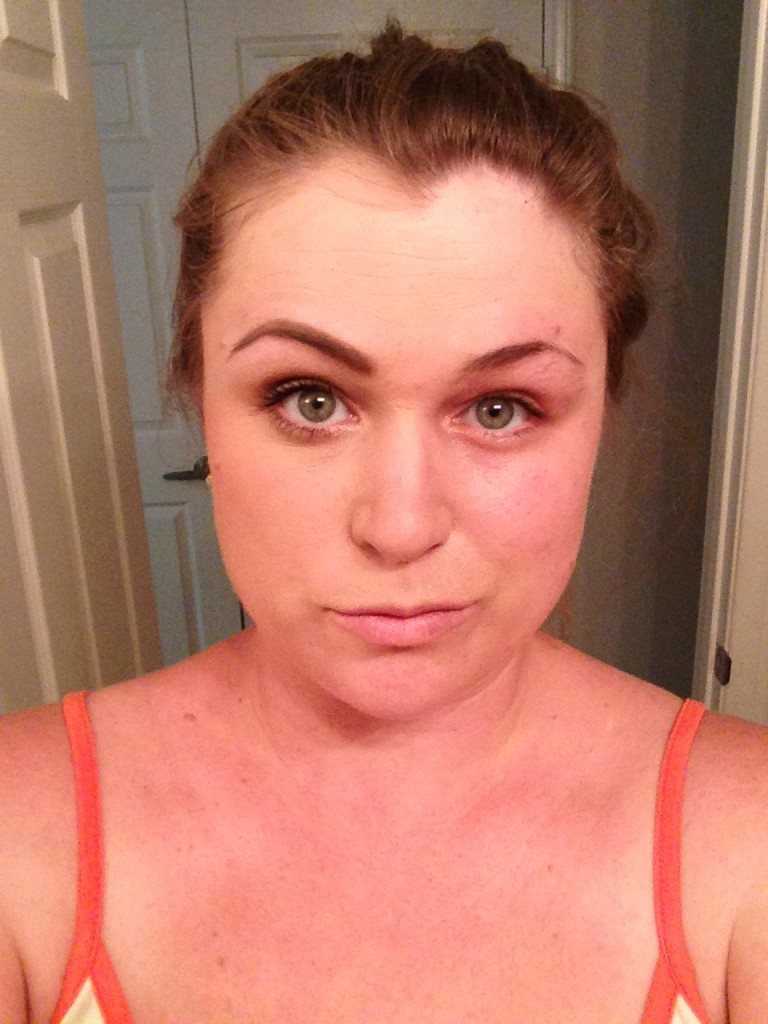
Amazing, right?
Please let me know if you have any questions, or what other tutorials you would like to see! If I get enough questions I will do a Q&A feature! Email me at mommylikewhoa@gmail.com
This post contains affiliate links from Amazon. I will receive a small commission if you purchase anything from them.
Stay Happy and Stay Informed!
Love,
Jen