Today I am SO very excited to introduce a very special person here on JENerally Informed. Berta from Mommy Like Whoa is guest posting and sharing with all of us her 10 minute makeup tutorial. That’s it 10 minutes and my makeup can be done? This is amazing and exactly what my time starved life needs. So without further ado I’ll turn it over to Berta!
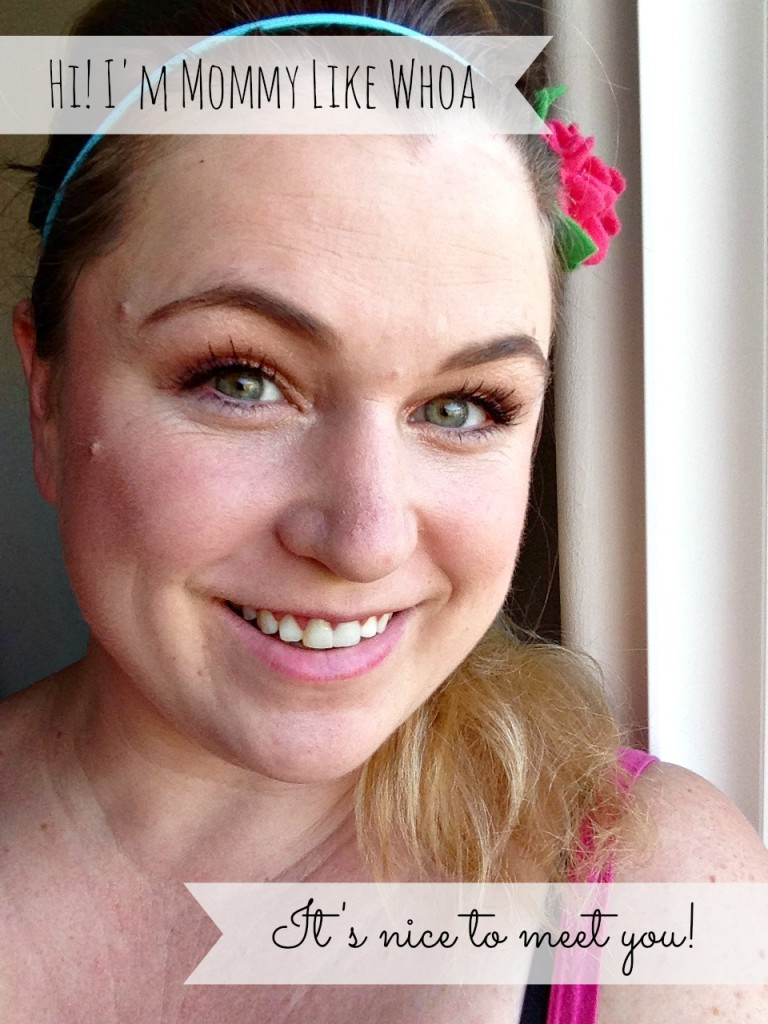
Hey Guys! My name is Roberta, but everyone calls me Berta, and I blog over at Mommy Like Whoa! I’m really excited that Jen asked me to come over and do a guest post on her blog!
Here’s a little bit about me; I have a 2 year old daughter and an 8 year old step daughter, and I’ve known my husband 23 years! I’ve been involved in the professional beauty industry since 2001, doing hair, makeup and education for big companies like Paul Mitchell and Alterna. Now that I am a mom, my high paced salon life has come to a nice slow leisurely stroll, and I am more than OK with that! I still work in the salon 2 days a week and it’s the perfect amount for me! Between running a household and running a blog, there isn’t much wiggle room left!
I am here for you guys! I can answer your beauty questions (and if I don’t know the answer myself, I can find it out for you!) and help you navigate the sometimes scary world of hair and makeup. It’s really not that hard, and I can teach you! I will be contributing to this blog every now and then, with quick beauty tutorials, insider info, Q&A and some really awesome must have products to check out too! So I hope you will stop by and check in with me, and maybe learn a thing or two!
I’ve decided my first post will be a quick 10 minute face. Something you could very easily do if you have to run out somewhere and don’t want to look like death warmed over, but also not look like you tried too hard for the grocery store. Some of these steps could even be omitted for a 5 minute face, but let’s not get ahead of ourselves!
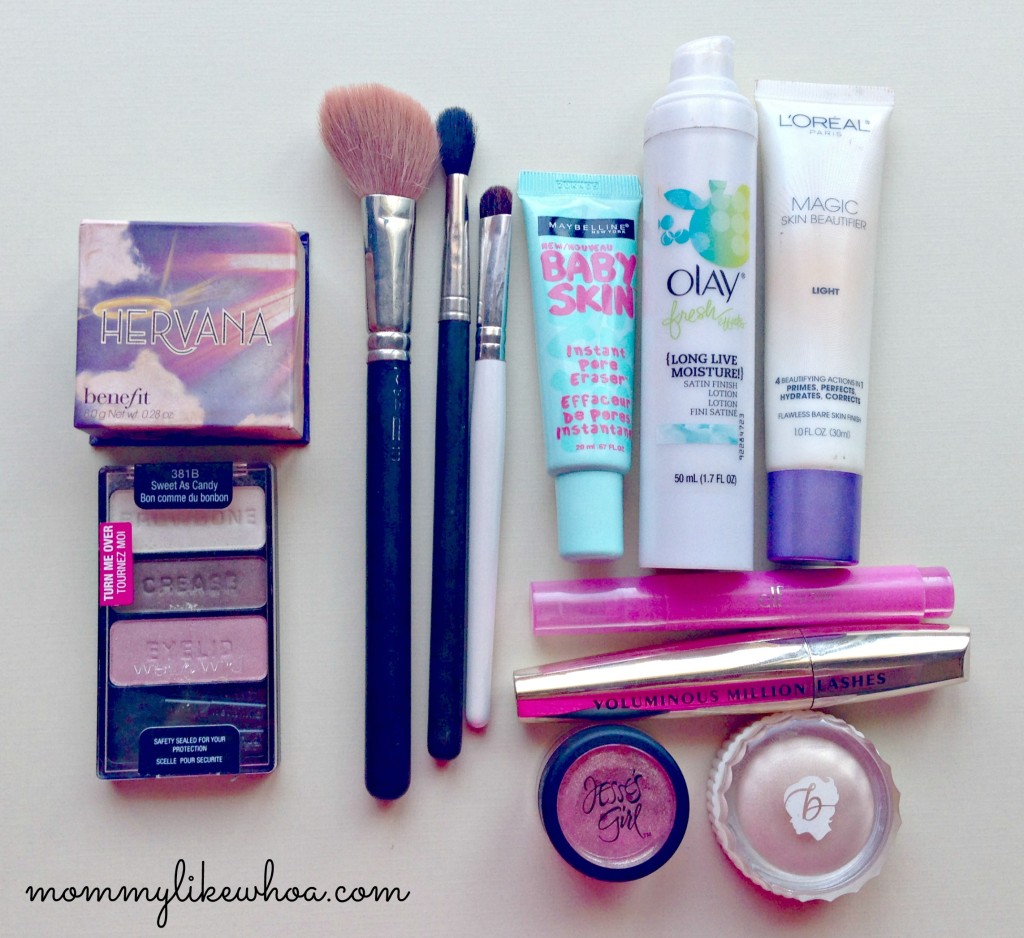
My first bit of advice is always always always put on moisturizer! ALWAYS! It’s very important! Even for those of you with oily skin! Your skin is going to want to moisturize itself in the form of oil, so if you aren’t feeding it, it will produce more oil! If you start moisturizing daily, you will notice a big difference. It won’t happen in a day, but eventually your skin will calm down and you will see the change. Like I said, I am not a product snob, so any moisturizer that works for you, (budget, availability, favorite brand) works for me. There are just as many great drug store brands out there as there are high end department store brands. I really love Olay Fresh Effects because it’s very silky and smooth, and is only about $15. If you are unsure of what to use, you can always ask your dermatologist, or do some research. Shop girls at the beauty counter, as well as the facialist at the salon are there to SELL PRODUCT! You don’t NEED to spend $100 on face cream! Shop around, do some research and find what works for you.
After moisturizer, let’s talk about face primer. Primer is wonderful because it preps the skin for makeup! It helps fill in fine lines and wrinkles and gives you a “clean slate” to work with. There are lots of primers out there and I am probably tried most of them. Baby Skin has a new one that just came out and it’s fantastic! It’s called the Pore Eraser and it helps minimize pores and hide skin imperfections. I highly recommend using one because it will help your makeup stay on all day and what is the point of a 10 minute face if you have to put it on 3 times throughout the day?
Foundation is not mandatory, but some people like to use it. For a quick face I would suggest a BB cream, or a very light coverage liquid foundation. L’Oreal makes great ones! I love their BB cream and I love their Liquid Magic Nude Powder foundation. It’s very light, you apply both with your fingers, and they both blend in very well. If you like a full coverage, use a full coverage foundation. I always opt for liquid vs cake foundation because it looks more natural and is easier to work with. If you have a favorite you can’t live without, by all means, use it.
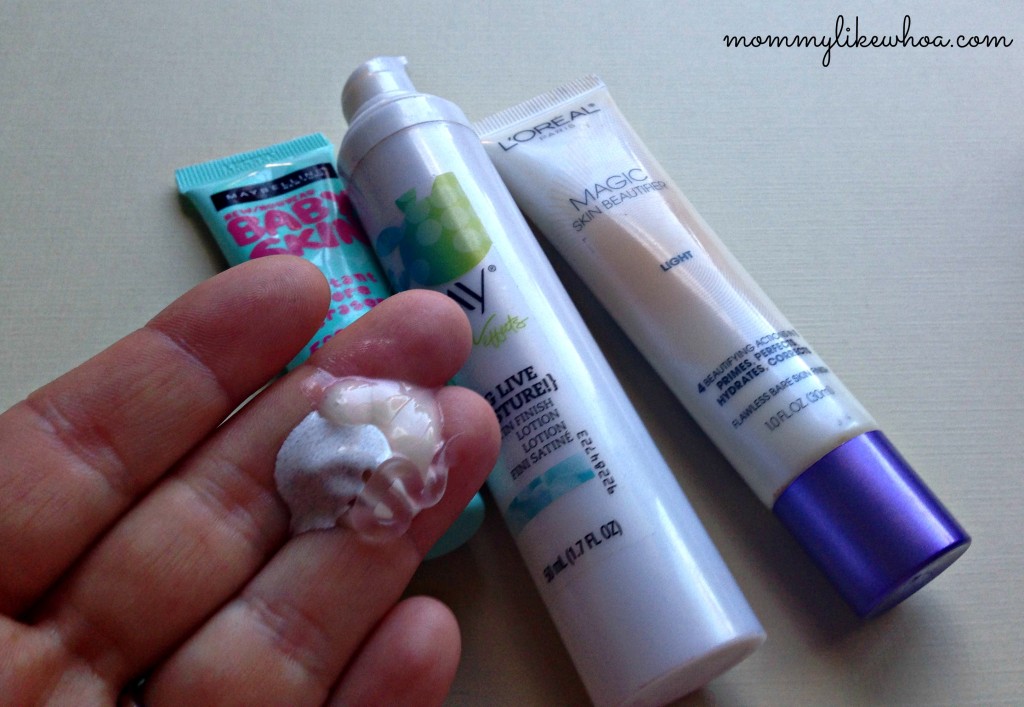
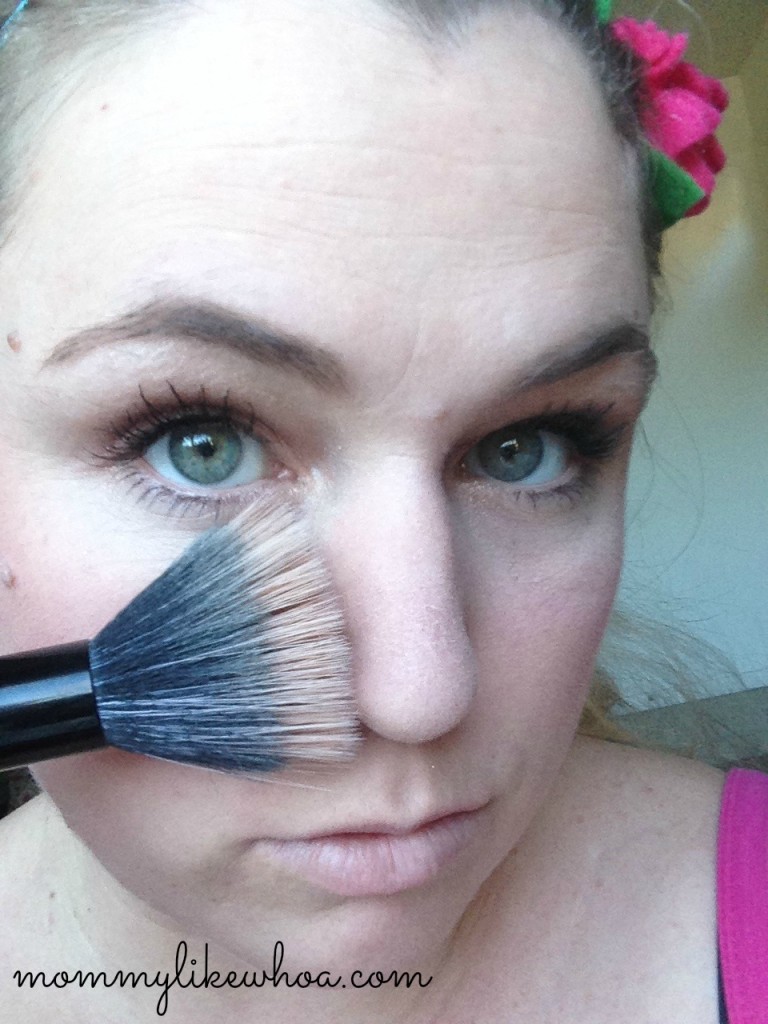
The quickest way to apply these products is to cocktail them together! It sounds weird, but it really works! Just take a bit of your moisturizer, primer and BB cream (or foundation for more coverage) and mix them together. It looks like a lot of product, but trust me, the moisturizer and primer will absorb into your skin, leaving just the color.
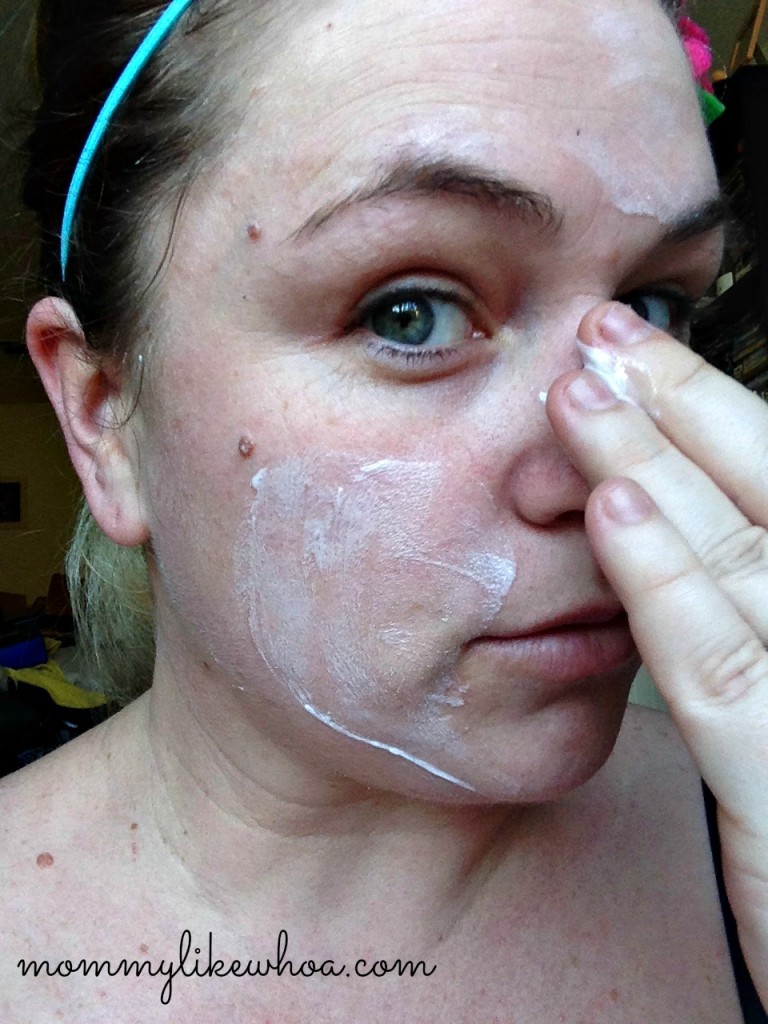
Rub in with your fingers like you’re applying face cream, making sure you blend down onto the neck and into the hairline. Any extra product can be absorbed with a damp face sponge, or blended away.
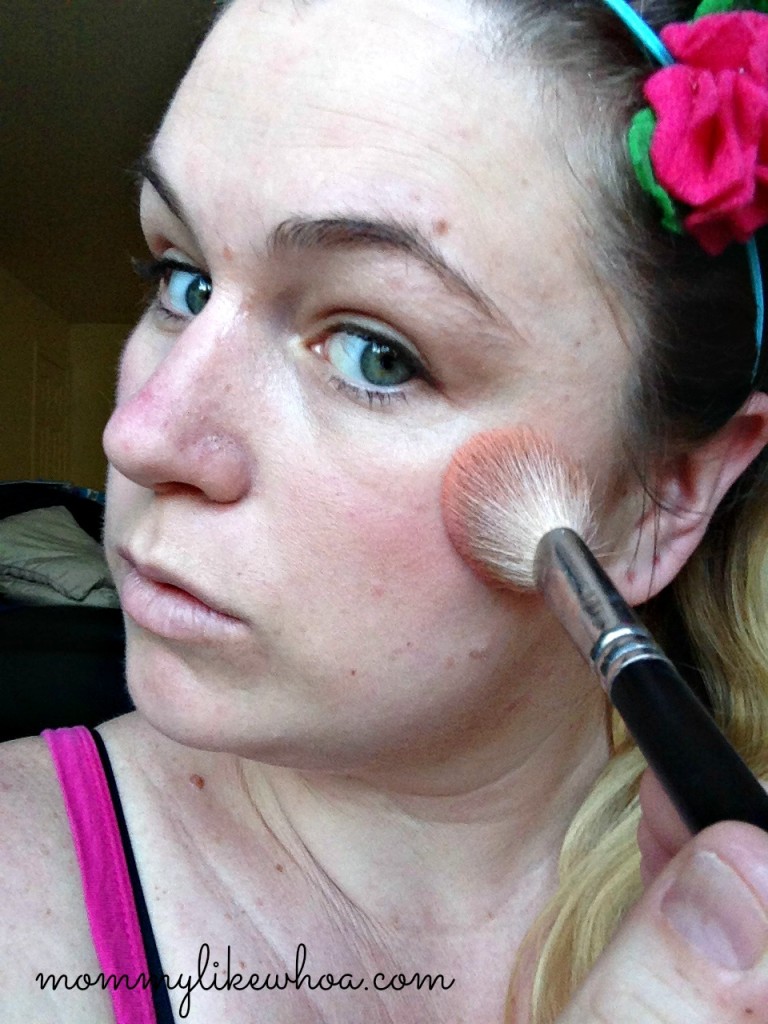
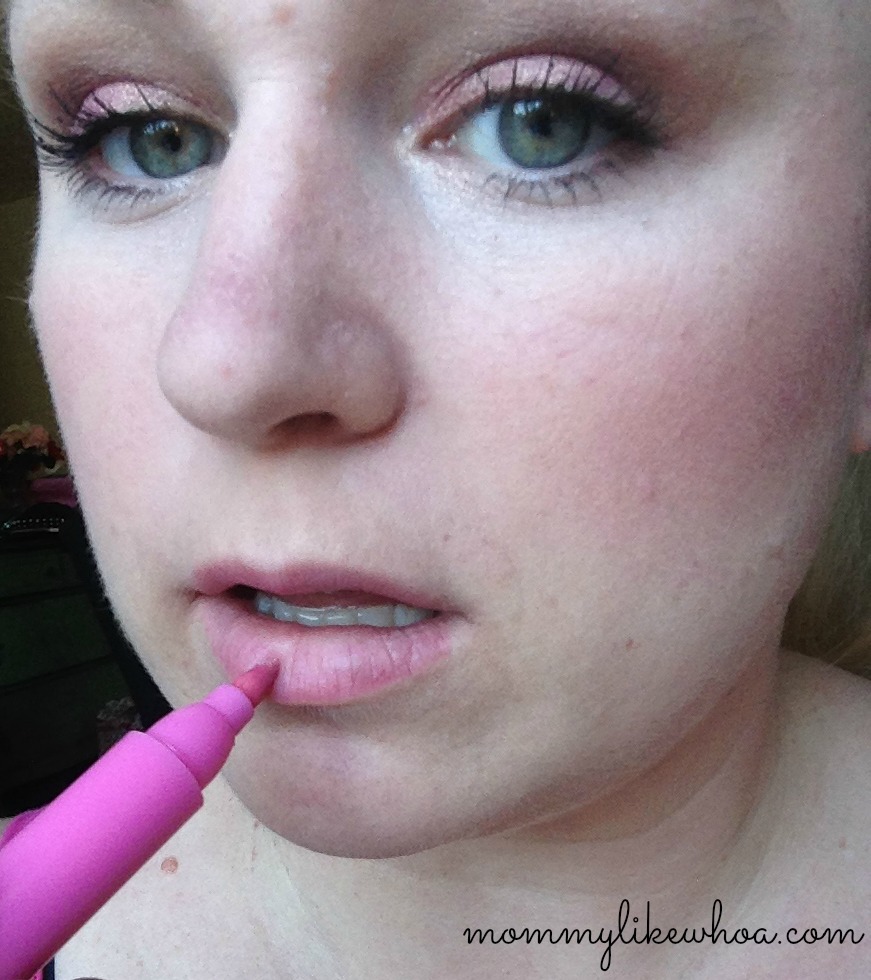
A quick brush of blush on the apples of your cheeks will give you a fresh faced look. Opt for pinks and peaches for a natural flush. I’m using Hervana by Benefit.

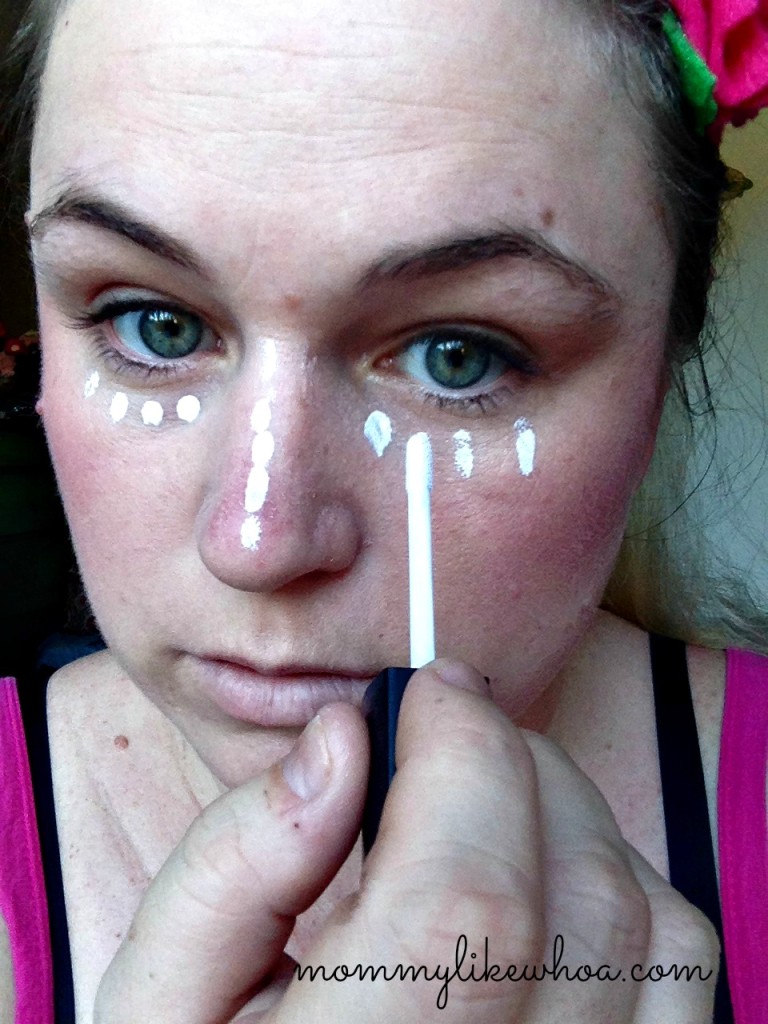
If you need a bit of concealer, to hid those under eye circles, or for me, my red nose… dab a few dots on your face with your concealer, and dab into skin with your fingertips. The warmth of your hands helps the product evenly spread and blend in.

For your eyes, start with a creaseless cream shadow. Benefit and MAC make great ones, but so does Maybelline! I use a golden nude shimmer color all over my lids.
I then take a darker brown color and do a quick sweep through my crease area. Make sure you blend! Using a fluffy brush can help blend very well. My favorite is the MAC 224 brush.
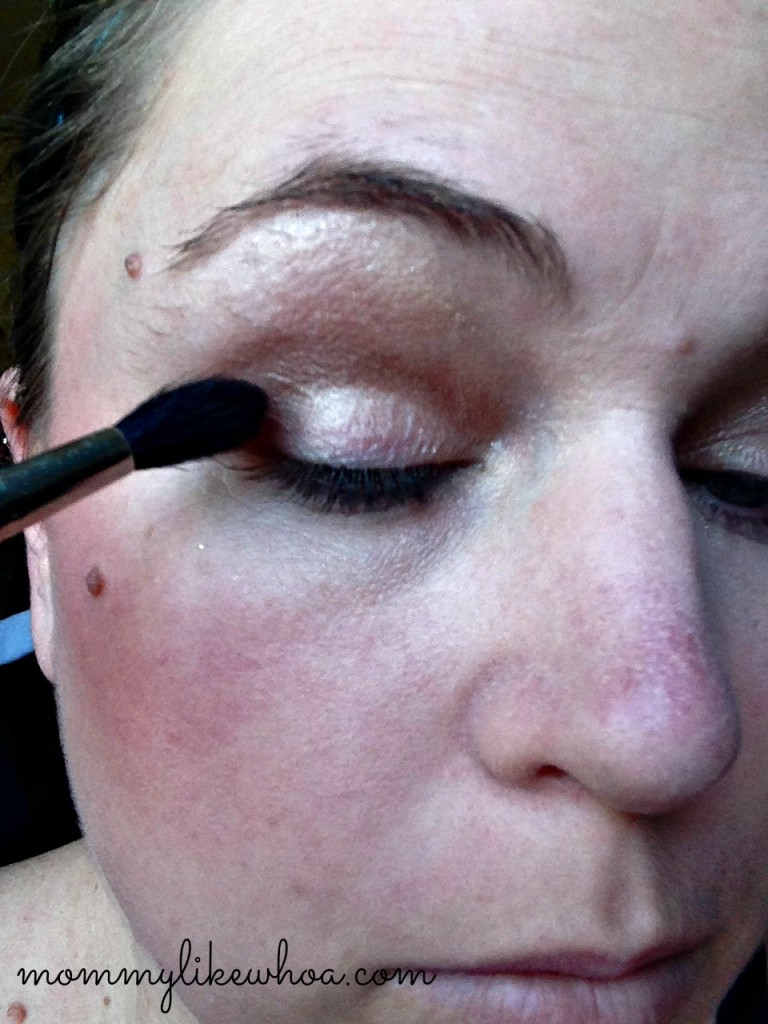
Next, place a shimmery golden pink color all over the lid. Make sure you pat it on using a large shadow brush, and don’t overload with product or you’ll end up with lots of shimmery fall out all over your face.

A few coats of black mascara… I opted out of using eyeliner for this tutorial because it’s a “quick face” and eyeliner can look harsh with such a natural fresh look. If you have to have it, by all means, put some on!

And don’t forget your brows! I will definitely be doing a brow tutorial in the future because I see too many bad brows around! And it’s an easy fix!

And you’re done! The first time might take you a bit longer than 10 minutes to do, but it really is a simple and easy makeup application once you’ve learned the techniques. Less is more!

Do you have any questions for me? Would you like to see another makeup tutorial? Or maybe a hair one? Please let me know, and swing by and visit my blog for more beauty tips, along with lots of other handmade fun stuff!
Until next time, darlings!