
My oldest daughter just turned 15 years old. This year in lieu of traditional birthday presents she wanted to re-decorate her bedroom. A few years ago we moved into a new house and since then her bedroom has lacked any defined decorative theme and she wanted a room to reflect her taste and personal style. I get it, so over the past 2 weeks we have transformed her space into something we think would make even Martha Stewart proud!
One of the projects we worked on was a simple wall art project that we made for the largest wall in her room.

If you are interested in picking it up for yourself, please feel free to use the affiliate link below.
So now I am going to turn things over to Jen’s Guy to share with you how to mount your own canvas wall art!
Materials needed
Electric drill
Chop saw (or a mitre box. Just make sure that you can get straight, accurate cuts.)
Screws (I used #6 by 1 and a half inch)
Wood (I used 1 by 2 inch lumber. If you were doing a larger job, you may want to use something thicker.)
Staple gun
Canvas Art Work- Understand that when you get the artwork, like with this particular artwork, it was 4 separate canvas rolls and looked nothing like the finished product you see here. You will need to apply some elbow grease to have it look like that, but don’t worry finishing and completing this project isn’t tremendously difficult.
Now Let’s Get Started:
First, measure your piece of canvas art. You will need both the height and width dimensions. If you are mounting a print, measure the actual surface area of the printed part of the picture, which should leave about a 2 and a half inch border to wrap around the frame. It is always best to measure twice and cut once. Once your pieces are cut, you should have 4 total pieces, one for the top and bottom and one for each side.

Second drill in the pieces together. You could also use nails, but a single screw at each joint will hold nicely.
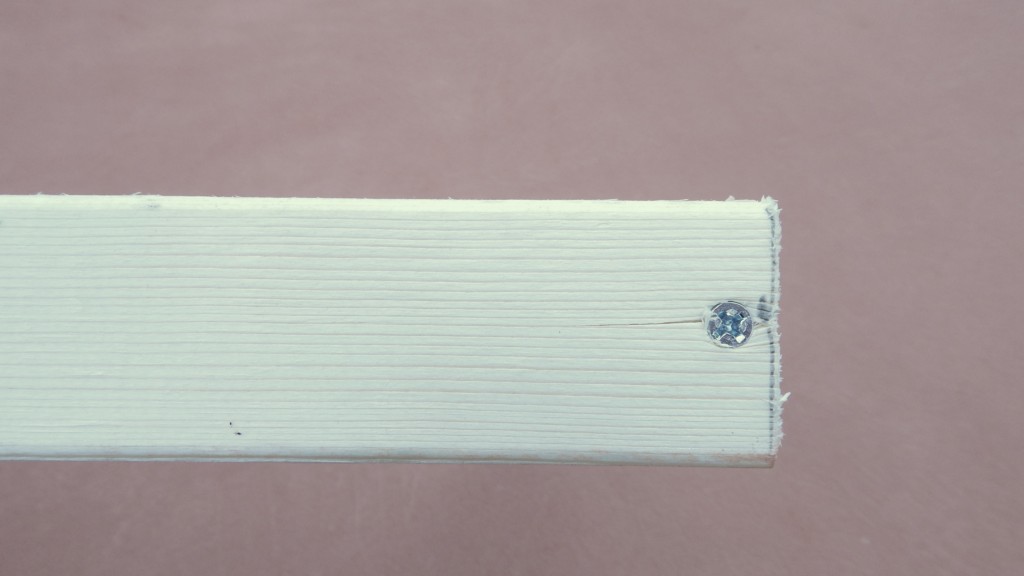
When you are finished your frame should look like this.

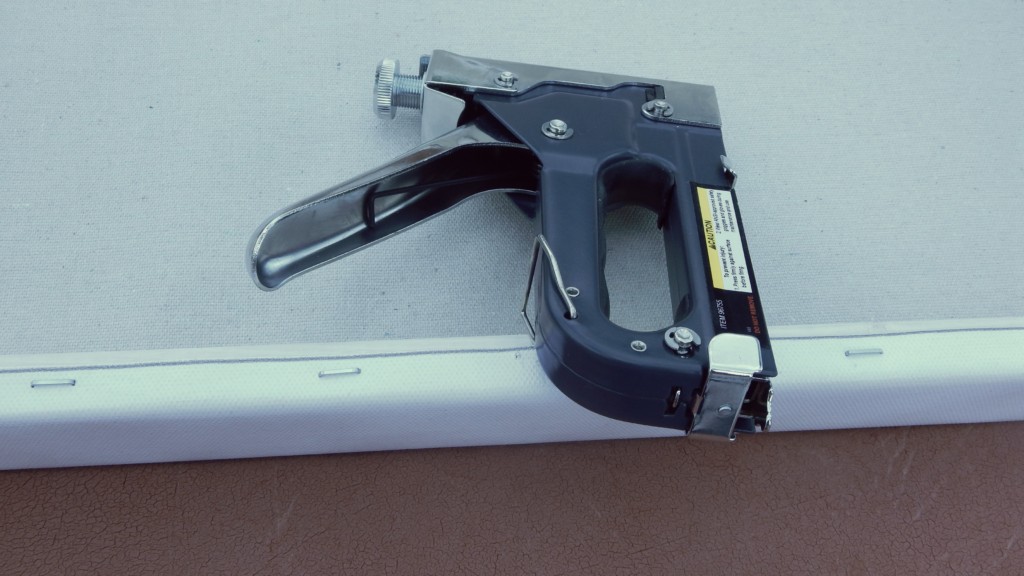
Next, lay your canvas flat and place the frame on the backside, centering it with the desired overlap on each side. Wrap the canvas up over the side of the frame and staple the canvas to the center of each long side, one staple for each.
Make sure to turn the project over to verify that the picture is centered correctly before stapling the whole picture.
If you are happy with the centering, go ahead and staple the center of the canvas on the top and bottom, so each side has a staple, and is pulled taught. You may then completely staple around the sides every two inches to within 3 inches of each corner. Make sure to pull the canvas as tight as possible before you staple each side so there isn’t any slack in the canvas.
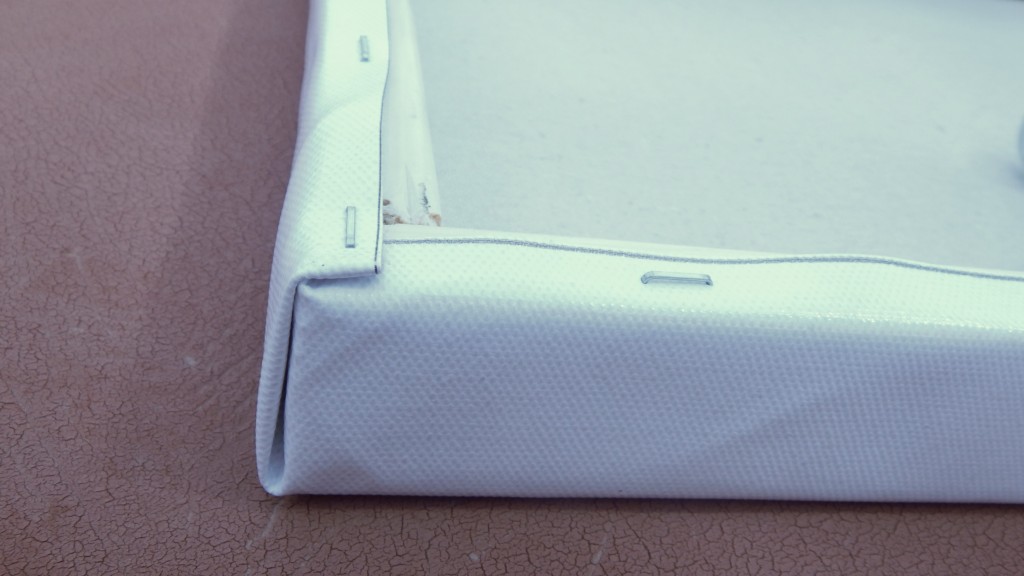
Next, fold the corners with the flap on the inside and the fold parallel to the corner. Place a staple in the three inches that you left previously, then staple the folded corner into place.
This particular piece of artwork had relatively small panels. For a larger piece of artwork you may need to purchase a special tool to help you stretch the canvas tightly. It resembles a large set of channel-lock pliers with a duck bill head. I however, am not that serious about stretching canvas for a living, so I made do without.

Our daughter is still so happy with this part of her birthday present and Jen’s Guy has already received several requests from her friends to make one for them as well. Maybe he ought to leave the IT world, and open an etsy shop. Those panels come in Star Wars too. . .
Jen’s Guy made me one extra frame for a super fun Fall inspired craft that I can’t wait to share with you all, so make sure to check back next week!
Stay Happy! Stay Informed!
Love,
Jen

Go ahead and share this post, you know you want to!